![]()
Universal OBDII T-harness
The OBD II T-harness is very easy to install and can be used to place the device behind the dash in addition to freeing up the OBDII port for use with a mechanic’s scan tools.
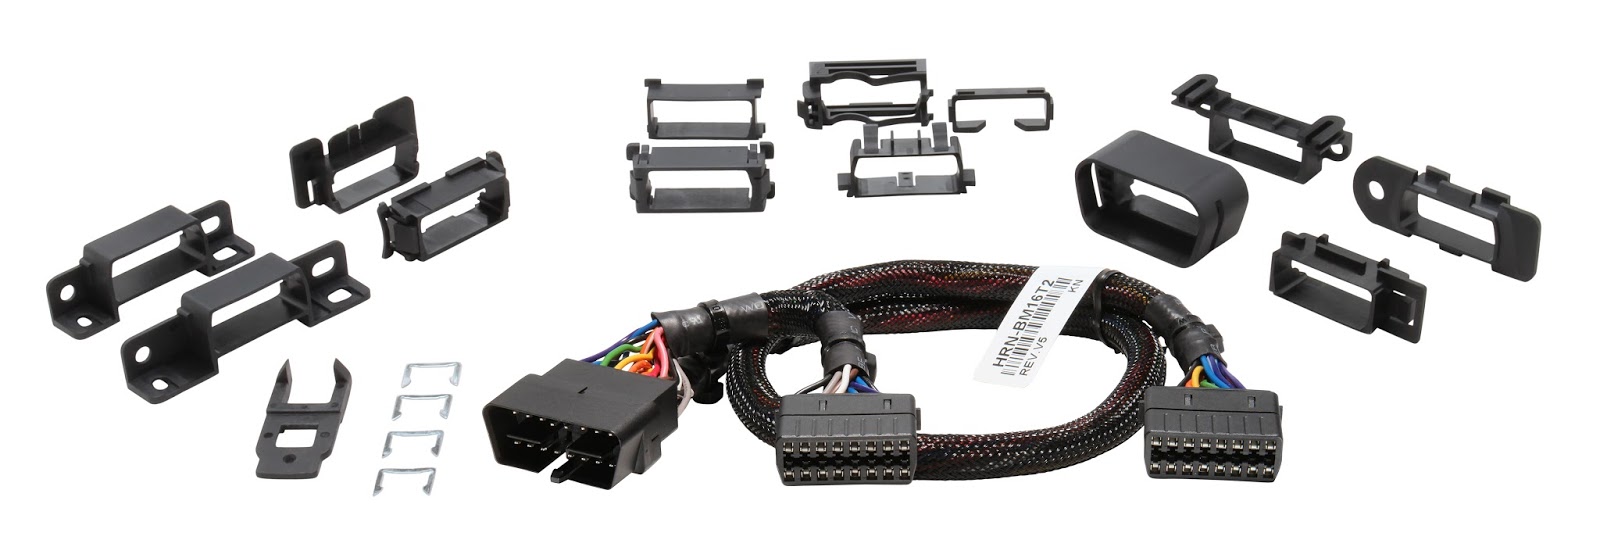 Universal 16 pin OBDII T-Harness Kit for the GO device
Purpose:
- Will extend the placement of the Geotab GO tracking device to help move the device out of harm’s way
- Required on vehicles where:
- the engine diagnostics port (OBDII) location will cause the device to impede the driver’s safe function of the vehicle
- the engine diagnostics port (OBDII) location does not allow for the device to connect securely
- Allows for a second OBDII connection for a mechanic to insert their own engine diagnostics scanner without removing the GO device
- Allows for hidden installation (semi-covert) as once installed the Geotab GO tracking device is out of sight of employees and thieves alike
Length: 24 inches (60 cm)
Max length of connected cables: 6.5 feet (2 meters)
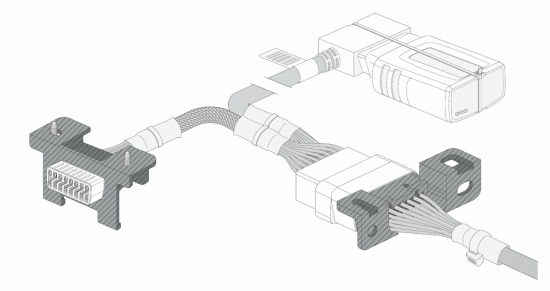
T-harness diagram:

Universal 16-pin OBD II T-harness installation (HRN-GS16K2) :
16-Pin OBDII T-Harness installation
- Locate the diagnostic port, usually found under the dashboard on the driver’s side. Identify the type of port connection, either screws or snaps. Remove the screws or unsnap the port. Connect one end of the 16-pin harness to the diagnostic port.
- Connect the device to the other end. You will see two lights on the device will flash briefly.
- Secure the device in place with a zip tie.
- [With the vehicle parked outdoors to locate satellites and vent exhaust fumes], turn on the ignition. The LED will start flashing. Red indicates power. Blue indicates GPS latch. Green indicates cell connection. Wait for all LEDs to come on. Once all LEDs are solid the device should be connecting properly.
- Zip tie the harness and the device up under the dash to a permanent location. To ensure quality of data, the device must not move in any way under the dash. Select the correct plate that fits the port and screw or snap into place. The installation is complete.
Complete Setup
After the device is plugged in, it may take a short drive (5 minutes, above 15km/h) for the GPS to register it’s location properly. You can check the map in the system or call us during our business hours to verify.
After this short drive, all of the lights should stay on until you turn off the vehicle.
Check Pricing
All of our GPS tracking solutions are customized for your business and tailored to your budget...
Return on Investment
At GPS Tracking Canada, we understand that every company benefits from GPS Tracking in different ways...
Request a Demo
Get a live one-on-one demonstration from GPS Tracking Canada. See for yourself how customized...
For more information, or to schedule a demo or an installation,
call us toll free at 1.877.477.0987